More Canvas Preparation
I have some more canvas preparation to show and a little bit of the process of setting a recess margin board around a painting on ply-board. This was the first time I have used gesso in the Utrecht gel. It was a little awkward to brush, but not something I was unfamiliar with after doing many years of drywall finishing. Halfway through I gave up resistance on thinning it and did so wtih a high-speed drill.
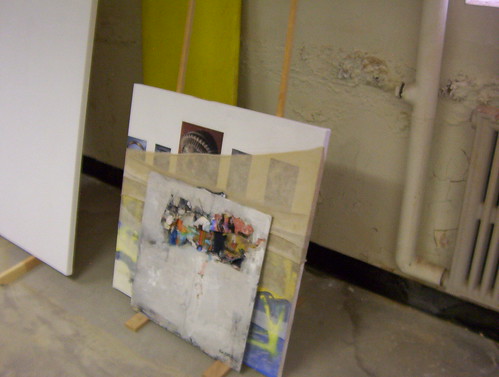
The above features two paintings. The smaller one done on plywood, the larger done on canvas. The latter, something my client decided to abandon. I would strip it off its frame and put new canvas on it.

One large painting (36" x 60") was stripped off its frame and preserved. I hung it on the dowel rod that came with the raw canvas and put plastic around as if it were dry cleaning. Mixed-media that are glued onto the front probably wouldn't withstand being rolled up. I assume that we will put it on styro-foam for something quick and easy. She said it was a transitional piece.
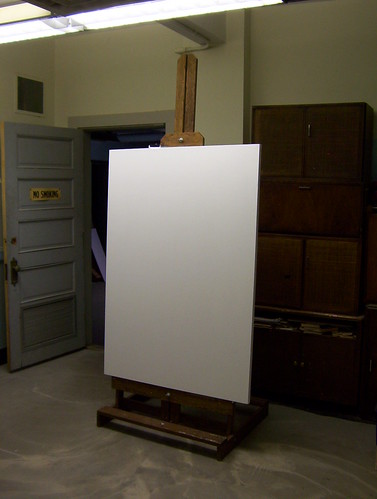
Here is the new canvas gessoed on that frame. And that's my oak easel that I built when I came back from Texas with the ton of scraps I saved working in a lumber mill. I haven't had a place with a high enough ceiling to use it since 1997. In the basement - shifting around for flourescents whose ballasts haven't burned out yet - it still seems a challenge with all the ductwork.
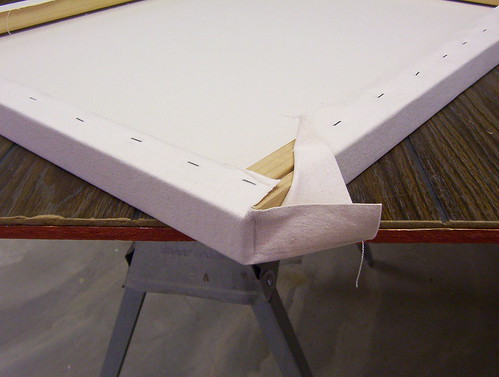
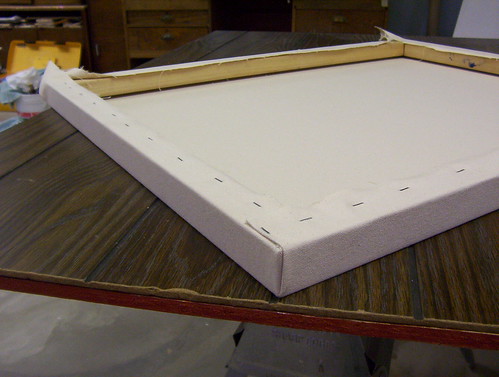
Here's a feature Ms. Cothren taught me about eliminating extra material beneath the tucked corners. I had never noticed it before.
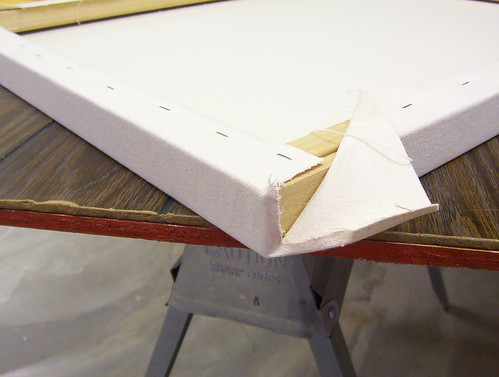
I still don't know if I'm doing it right.
I do know how to trim boards around objects without any space between them though:
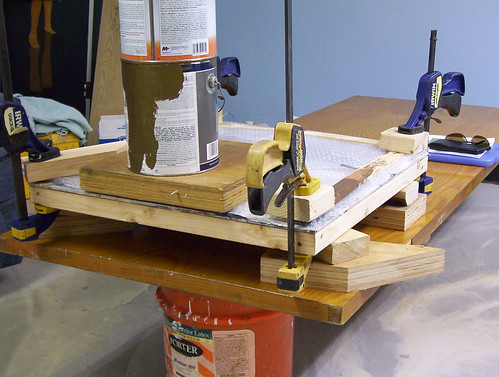
First, I had to glue something on the back of the plywood. I used a 2" x 3", something they are now featuring at Home Depot. It seems funny to me, that size. A 2" x 2" would not be sturdy enough. Without nails I just used some low VOC constructon adhesive layed on thick. I then put couple layers of bubble wrap between the painting and some small boards and clamped it all together. This could have been done ahead of time, but sometimes one just really wants to paint. That's where I come in handy.
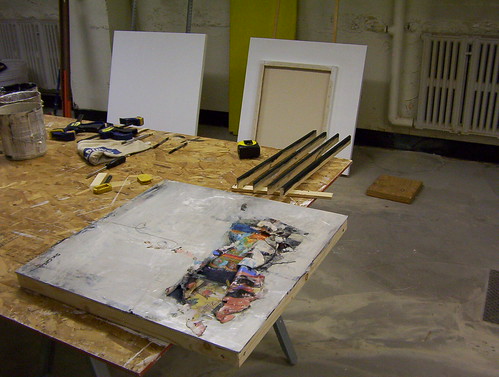
Here I have chopped the recess margin board (7/16" x 1-1/4" pine door stop) to a size approaching exact, primed and painted with flat black interior latex paint on the top edges, plus a little wrap down both sides. I then nailed one on at a time with a test piece at each end cut at the same angle.
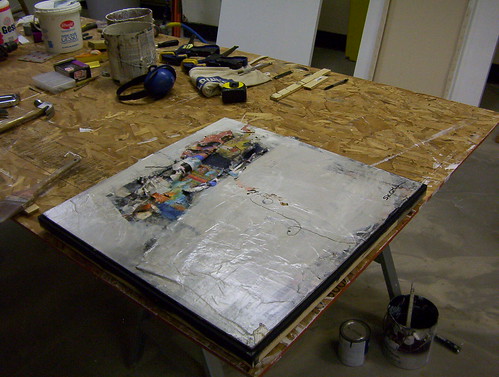
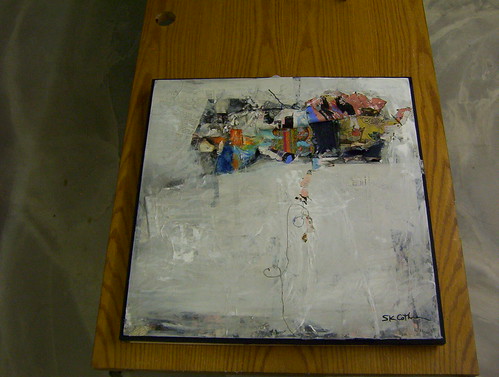
Above is the best square on photo I could take that illustrates how the black margin will set off the outside frame. At this point the artist seemed to like it just the way it was, albeit half an inch shy of the wall surface when hung.
There are some other sights about the building and an off-the-cuff series of snapshots of town that I took when I went to eat some lunch. I think I will start to feature some of them as an effort to share more personal insights and curios on this blog. I think finally learning how to manage more information with high speed internet has affected that decision, but I will add them onto the next entry.

The above features two paintings. The smaller one done on plywood, the larger done on canvas. The latter, something my client decided to abandon. I would strip it off its frame and put new canvas on it.

One large painting (36" x 60") was stripped off its frame and preserved. I hung it on the dowel rod that came with the raw canvas and put plastic around as if it were dry cleaning. Mixed-media that are glued onto the front probably wouldn't withstand being rolled up. I assume that we will put it on styro-foam for something quick and easy. She said it was a transitional piece.

Here is the new canvas gessoed on that frame. And that's my oak easel that I built when I came back from Texas with the ton of scraps I saved working in a lumber mill. I haven't had a place with a high enough ceiling to use it since 1997. In the basement - shifting around for flourescents whose ballasts haven't burned out yet - it still seems a challenge with all the ductwork.

Here's a feature Ms. Cothren taught me about eliminating extra material beneath the tucked corners. I had never noticed it before.

I still don't know if I'm doing it right.

I do know how to trim boards around objects without any space between them though:

First, I had to glue something on the back of the plywood. I used a 2" x 3", something they are now featuring at Home Depot. It seems funny to me, that size. A 2" x 2" would not be sturdy enough. Without nails I just used some low VOC constructon adhesive layed on thick. I then put couple layers of bubble wrap between the painting and some small boards and clamped it all together. This could have been done ahead of time, but sometimes one just really wants to paint. That's where I come in handy.

Here I have chopped the recess margin board (7/16" x 1-1/4" pine door stop) to a size approaching exact, primed and painted with flat black interior latex paint on the top edges, plus a little wrap down both sides. I then nailed one on at a time with a test piece at each end cut at the same angle.


Above is the best square on photo I could take that illustrates how the black margin will set off the outside frame. At this point the artist seemed to like it just the way it was, albeit half an inch shy of the wall surface when hung.
There are some other sights about the building and an off-the-cuff series of snapshots of town that I took when I went to eat some lunch. I think I will start to feature some of them as an effort to share more personal insights and curios on this blog. I think finally learning how to manage more information with high speed internet has affected that decision, but I will add them onto the next entry.
Comments
Post a Comment